
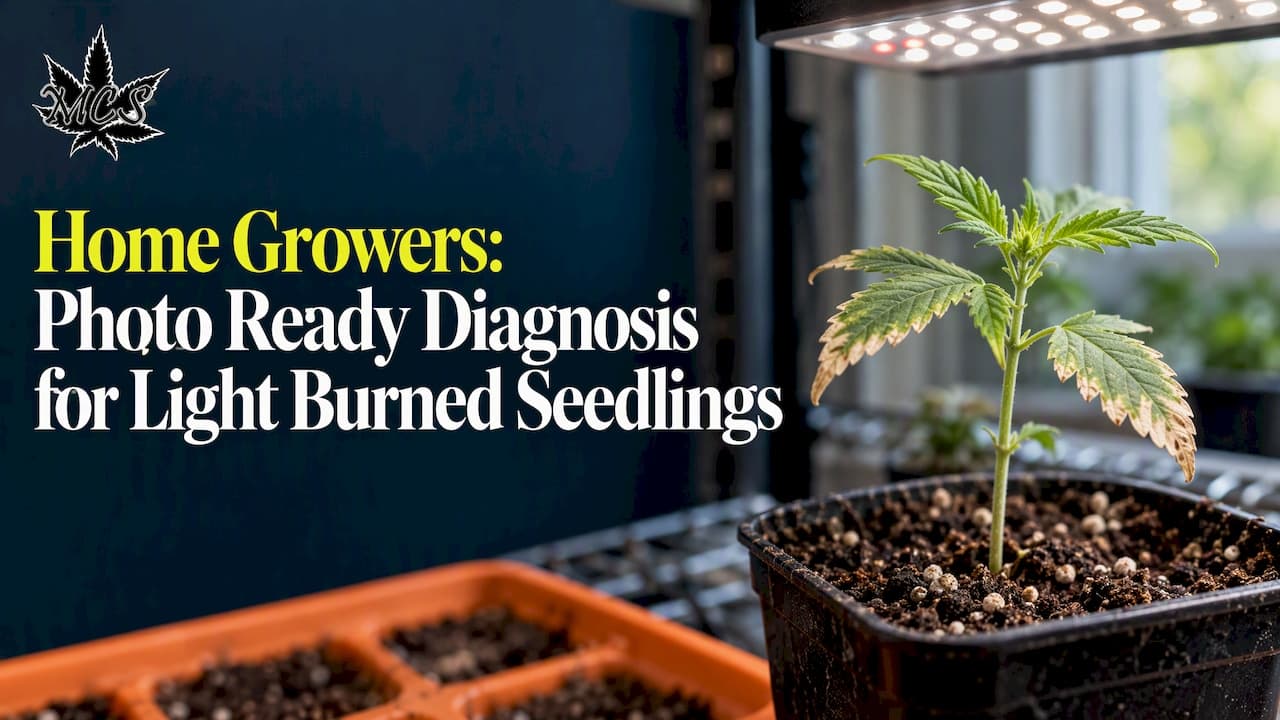
If your seedlings show whitened, crispy leaf tips concentrated at the top of the tray, light burn is the most likely cause, and the fix starts immediately: raise the fixture or dial back intensity and add airflow to cool the canopy. Seedlings with only mild bleaching often recover within one to two weeks; tissue that has gone fully brittle and brown will not green back up. The sections below walk through confirming the diagnosis, understanding the cause, and building a recovery plan.
TL;DR:
- Using a high-intensity LED or an incandescent fixture can cause localized top leaves to bleach and crisp if placed too close or run at full power from the start.
- Raising the light fixture by at least 12 inches or gradually increasing distance by 20 to 30% every few days can prevent and correct light burn symptoms.
- Confirm light burn by checking for confined top leaf bleaching, warm leaves when touched, dry soil, and damage pattern limited to the upper leaves.
- Overwatering, nutrient burn, and damping-off can mimic light burn but have different symptoms such as soft yellow leaves or stem collapse, requiring different fixes.
- Using a PAR meter to monitor actual PPFD and maintaining proper fixture distance while increasing intensity gradually helps prevent seedling damage.
Table of Contents
- How to tell light burn apart from similar seedling problems
- Why light burns seedlings: PPFD, DLI, spectrum, and heat explained
- How to set up lights and acclimate seedlings to avoid burn
- Triage and recovery: step-by-step care and when to replant
- How to tell light burn apart from nutrient burn, overwatering, and damping-off
- Grow guides and germination support for recovering growers
- One habit that prevents most light burn cases
- Need to replace damaged seedlings? Here is where we come in
- FAQ
- Sources
How to tell light burn apart from similar seedling problems
Light burn shows up as bleaching or whitening on the uppermost leaves, often followed by crisping at the leaf tips or edges, and it stays concentrated at the top of the canopy where the fixture sits closest. This localized pattern is the clearest tell: a seedling suffering from nutrient burn usually shows browning that starts at leaf tips but spreads more evenly across the plant, while overwatering produces soft, yellowing leaves tied to a soggy substrate rather than crisp, bleached ones.
A few quick checks confirm what you are dealing with before you change anything else:
- Raise the light six to twelve inches and recheck the canopy after 24 to 48 hours; new growth that looks healthier points to light stress.
- Touch the leaves near the top of the tray. Heat radiating off a fixture or warm foliage suggests the light source itself is the problem.
- Check the substrate. Dry soil with crisp, bleached leaf tops supports light burn; soggy soil with yellow, limp leaves points to overwatering instead.
- Look at the pattern. Damage isolated to the top two or three leaves is consistent with light exposure; damage spread evenly across the whole plant usually is not.
Photoinhibition, the physiological process behind light burn, occurs when light intensity exceeds what a seedling's photosynthetic machinery can safely process, damaging Photosystem II and producing the bleached, crisped tissue growers see at the canopy top, according to a review of plant light-stress responses. If the symptoms match this pattern and the light-distance test confirms it, act right away. If the substrate is wet and the damage pattern is scattered rather than top-heavy, hold off on touching the lights and address moisture and drainage first.
Why light burns seedlings: PPFD, DLI, spectrum, and heat explained
Two measurements explain most light burn cases. PPFD (photosynthetic photon flux density) describes how many usable light particles hit the canopy each second, while DLI (daily light integral) totals that exposure across a full day. Seedlings have a narrow photosynthetic capacity, and once PPFD or cumulative DLI exceeds what their young tissue can process, the excess energy damages cell structures instead of fueling growth. UNH Extension notes that light intensity falls off quickly with distance, so a fixture that looks safely far away can still deliver damaging intensity if it is a powerful LED panel rather than a low-output shop light.
Fixture type matters because heat and intensity do not scale together. A fluorescent shop light runs cool and dim enough that seedlings can sit close to it, while a modern LED panel can push far more intensity from the same distance and run warm enough to scorch leaf tissue if left too close. Incandescent bulbs generate the most heat per unit of usable light and are the least forgiving option for seedling trays.
| Fixture type | Relative intensity | Heat output | Safe starting distance |
|---|---|---|---|
| Fluorescent shop light | Low to moderate | Low | 2 to 4 inches |
| LED panel (seedling-rated) | Moderate to high | Low to moderate | 12 to 24 inches |
| Incandescent/standard bulb | Low | High | Not recommended for seedlings |
Spectrum shapes vulnerability too. A lighting guide from Michigan State University explains that fixtures heavy in far-red light push stem elongation, while blue-heavy spectrums suppress stretching and boost chlorophyll, which changes how much visible stress a seedling shows under the same intensity. Environmental conditions compound the risk: a study on light and water interaction in seedlings found that excess light combined with limited water intensifies photodamage, while adequate moisture and moderate shading reduce it. Seedlings have photoprotective tools of their own, including non-photochemical quenching and anthocyanin buildup that can tint leaves purple or red under stress, but these defenses are built for brief spikes in light, not sustained overexposure.
How to set up lights and acclimate seedlings to avoid burn
Prevention comes down to distance, pacing, and environment, in that order. Start fixtures farther away than you think you need to, then bring them closer gradually as seedlings show they can handle more.
- Start fluorescent shop lights 2 to 4 inches above the canopy, since their low heat and intensity make close placement safe.
- Start LED panels 12 to 24 inches away, adjusting based on the manufacturer's PPFD rating for seedling stage.
- Ramp intensity gradually rather than running fixtures at full output from day one.
- Keep airflow moving across the tray with a small fan to prevent heat from building up in still air near the canopy.
- Avoid extreme humidity swings, since poor airflow paired with high relative humidity cuts transpiration and can produce leaf-edge symptoms that mimic light damage.
UNH Extension recommends a gradual acclimation ramp, such as raising intensity by roughly 20 to 30% every two to three days, or moving the fixture closer in small increments rather than jumping straight to the final distance. This device-agnostic approach works whether you are running fluorescent tubes, LED panels, or a hybrid setup, and it gives seedlings time to build up the photoprotective responses that let them handle stronger light later without damage.
A handheld PAR meter takes the guesswork out of this process by reading actual PPFD at canopy height, which matters because the same fixture can deliver very different intensity depending on distance, dimmer settings, and age. Growers without access to a meter can rely on a simpler check instead.

Pro Tip: Hold the back of your hand at seedling height for 30 seconds; if it feels uncomfortably warm, the light is too close or too strong.
Ballast heat is a common oversight with older fluorescent and HID setups: the ballast itself can radiate enough heat to stress nearby seedlings even when the bulb distance looks correct, so route cords and ballasts away from the tray. Adjustable hangers or pulley systems make the gradual ramp far easier to manage than manually repositioning a fixture every few days, since small height changes take seconds instead of a full setup adjustment.
Triage and recovery: step-by-step care and when to replant
Act on three fronts as soon as you confirm light burn: reduce intensity, improve airflow, and remove any damaged tissue that will not recover.
- Raise the fixture or switch to a lower-output setting immediately.
- Add or increase airflow with a small fan positioned to move air across the canopy without battering fragile stems.
- Trim fully necrotic leaves carefully, since dead tissue will not green back up and can become an entry point for fungal issues.
- Reduce photoperiod slightly for a few days to lower overall daily light exposure while the plant recovers.
- Hold off on fertilizer until new growth appears healthy, since stressed root systems handle nutrient surges poorly.
Recovery follows a fairly predictable timeline. By day 3, expect no visible improvement yet, but watch for whether damage has stopped spreading. By day 7, new growth should appear noticeably less bleached than the damaged leaves beneath it. By day 14, a recovering seedling typically shows a full set of healthy new leaves, with the original damaged tissue still visible but no longer expanding.
| Timeframe | What to expect | Action |
|---|---|---|
| Day 3 | Damage stops spreading | Confirm new light distance is holding |
| Day 7 | New growth appears less bleached | Resume normal photoperiod gradually |
| Day 14 | Full healthy leaf set visible | Resume light feeding if growth looks stable |
If a seedling shows no new growth by day 10 to 14, or if the growing tip itself has gone brown and brittle, it is usually beyond recovery and replacing it is the more reliable path forward. While the plant recovers, keep humidity moderate rather than high, since damaged tissue combined with damp, still air raises the risk of fungal problems on top of the original light stress. The Cannible lighting guide covers additional fixture-specific troubleshooting steps worth reviewing if you are running an LED setup and want to rule out hardware issues alongside placement.
How to tell light burn apart from nutrient burn, overwatering, and damping-off
Each of these problems looks similar at a glance but calls for a different fix. Light burn shows bleached, crisp leaf tips concentrated at the canopy top with dry substrate underneath. Nutrient burn produces browning that spreads more evenly across leaf edges rather than staying localized to the uppermost growth, and our guide to cannabis deficiencies breaks down how specific deficiencies and excesses show up on leaves. Overwatering produces soft, yellowing leaves tied to consistently wet soil and, when checked, mushy or discolored roots rather than the firm white roots of a healthy seedling. Damping-off, a fungal issue, causes sudden collapse at the soil line rather than leaf-tip damage, and it typically kills the seedling within a day or two of the stem thinning out.
- Dry soil, bleached top leaves: adjust light distance or intensity.
- Wet soil, yellow soft leaves: cut back watering and improve drainage.
- Stem collapse at soil line: remove the seedling and improve airflow and sanitation for the rest of the tray.
Grow guides and germination support for recovering growers
When a seedling does not pull through, having reliable replacement genetics on hand matters. Our catalog includes a Black Gold grow guide and an autoflower growing guide covering germination, seedling lighting, and early acclimation for specific strains. Every seed purchase comes backed by a germination guarantee, which gives home growers a safety net while they dial in lighting setups and build the habits that prevent repeat damage.

One habit that prevents most light burn cases
The most common mistake is running a new fixture at full intensity on day one because the specs looked safe on paper. The habit that fixes this: a five-minute weekly check of light distance, canopy heat, and leaf color before anything drifts out of range.
— Dino Grow Master
Need to replace damaged seedlings? Here is where we come in
If light burn has cost you a few seedlings, restarting with reliable genetics beats troubleshooting a struggling plant indefinitely. Our full seed catalog covers feminized, autoflower, and CBD options, each backed by a germination guarantee so a failed start does not mean a wasted order.

For growers who want a lower-maintenance restart while they refine their lighting setup, our autoflower seed collection tends to forgive early mistakes more easily than longer photoperiod strains, since autoflowers move through the seedling stage faster and spend less time exposed to an unoptimized setup. Browse the catalog, check the strain-specific grow guides, and place an order backed by the germination guarantee if you need to start fresh.
FAQ
How can I tell light burn apart from nutrient burn?
Light burn causes bleached, crisp leaf tips concentrated at the top of the canopy closest to the fixture, while nutrient burn typically shows browning that spreads more evenly across leaf edges on multiple levels of the plant. Checking whether the damage is isolated to the top growth or scattered throughout the plant is the fastest way to tell them apart.
Is it okay to give seedlings 24 hours of light?
Continuous light is not necessary for seedlings and can add unnecessary stress on top of other light exposure issues. Most guidance favors a defined photoperiod with a rest period, since seedlings do not need round-the-clock exposure to grow well.
What do overwatered seedlings look like?
Overwatered seedlings typically show soft, yellowing leaves along with root-zone problems caused by waterlogged soil, according to UMN Extension. This differs from light burn, which produces dry, bleached, and crisp tissue rather than soft and yellow leaves.
What happens when seedlings get too much light?
Excess light overwhelms a seedling's photosynthetic capacity and can damage Photosystem II, the cellular structure responsible for capturing light energy, producing visible bleaching and crisping concentrated at the canopy top, as described in research on plant light stress. Mild cases often recover with adjusted distance and intensity, while severe cases leave permanent damage on the affected leaves.
Does Montreal Cannabis Seeds offer a germination guarantee?
Yes, every seed order comes with a germination guarantee, giving growers a backup if seedlings are lost to light burn or other early-stage issues. Details on coverage are available on our main catalog page.
Sources
- Adaptive responses of plants to light stress: mechanisms of photoprotection and acclimation. A review - PMC
- Growing seedlings under lights (UNH Extension) — fact sheet
- Tips for keeping seedlings healthy (UMN Extension)