
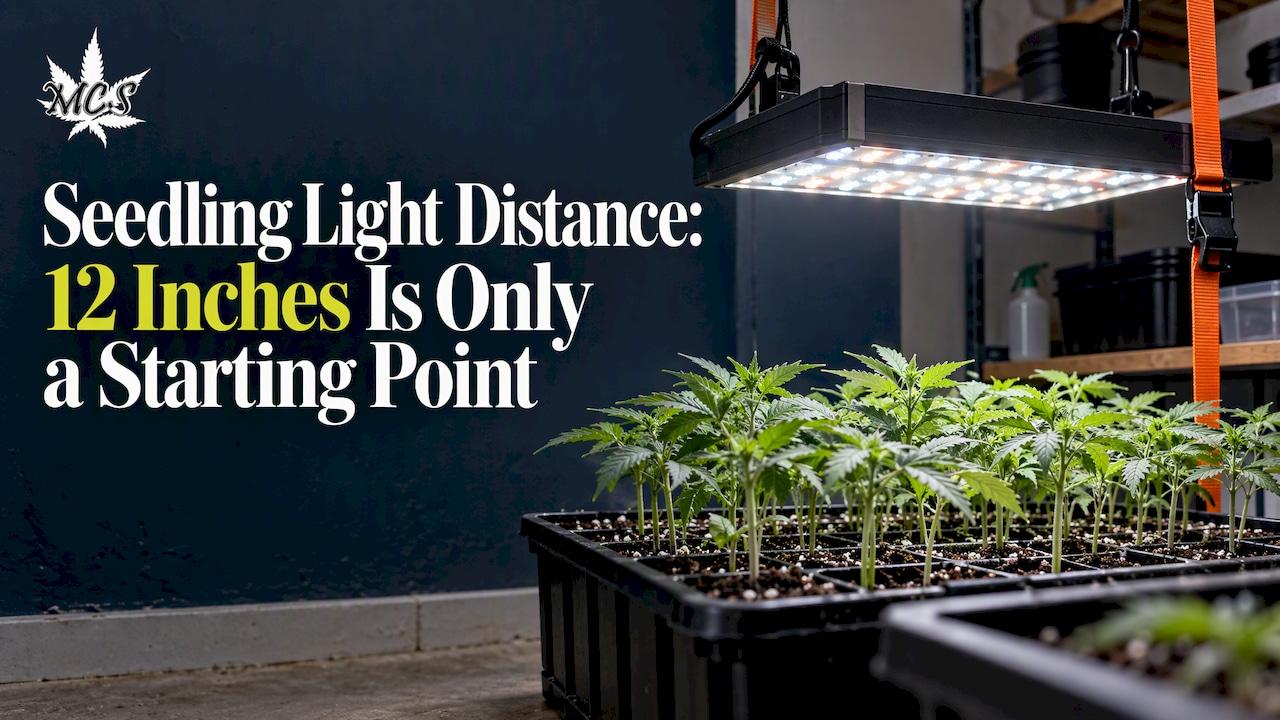
A good starting point is about 12 inches (30cm) for LED panels, 4 to 6 inches (10 to 15cm) for fluorescent or T5/T8 tubes, and roughly 36 inches (90cm) for HID fixtures, paired with a PPFD target of 100 to 300 µmol/m²/s and a 14 to 18 hour photoperiod. Check your seedlings within 24 to 48 hours for stretch or bleaching, and adjust distance before either problem sets in.
TL;DR:
- A fixture’s wattage does not determine a universal hanging distance; consult its documentation because lenses, reflectors, and beam patterns change light distribution.
- Measure PPFD at canopy height, taking readings across the tray and averaging them because light intensity often drops near the edges.
- Check leaves and stems daily during the first two weeks: bleaching, upward curling, or crispy edges indicate excess light, while stretched stems signal too little.
- When leaves show heat stress, raise the light 5 to 10 cm and recheck the next day; lower it gradually if seedlings stretch.
- Dim the fixture when its coverage is right but its intensity is too high; move it farther away when you also need to change light spread.
Table of Contents
- Recommended Starting Distances and How They Map to PPFD and DLI
- Adjusting Distance as Seedlings Grow: Timing and Technique
- Signs Your Grow Light Is Too Close or Too Far
- How to Measure Light: PAR, PPFD, DLI, and Using a Light Meter
- Quick Practical Checklist: Setup Through the First 14 Days
- Lessons From Home Grow Setups on Light Distance
- Starting Strong: Why Seed Quality Still Matters
- FAQ
- Sources
Recommended Starting Distances and How They Map to PPFD and DLI
Seedlings are the most light-sensitive stage of a plant's life, and the right hang height depends heavily on what fixture sits above the tray. The University of Saskatchewan's growth cycle guidance lays out starting distances by fixture type that line up closely with what most extension programs recommend:
- LED panels: start at about 30cm (12 inches) above the canopy, since many modern diodes run hot and concentrated.
- Fluorescent tubes (T5/T8): start closer, at 10 to 15cm (4 to 6 inches), because these fixtures emit less heat per watt of usable light.
- HID fixtures (MH/HPS): start farther back, at roughly 90cm (36 inches), given the heat and intensity these bulbs throw off.
Those numbers are a starting point, not a fixed rule. The actual goal is photosynthetically active radiation, or PAR, measured at the seedling canopy as PPFD (photosynthetic photon flux density, in µmol/m²/s). Seedlings do best in a PPFD range of 100 to 300 µmol/m²/s, according to the UNH Cooperative Extension fact sheet on growing seedlings under lights, with intensity above that range risking leaf curling, bleaching, and stunting, while levels below it tend to produce leggy, stretched stems.
PPFD tells you intensity at a single moment, but daily light integral (DLI) tells you the total photon delivery over a full day. DLI is PPFD multiplied by the photoperiod in hours and converted to a daily total. A seedling getting 200 µmol/m²/s for 16 hours receives considerably more total light than one getting the same intensity for 12 hours, even though the instantaneous reading looks identical. This is why the UNH extension program emphasizes DLI over brand or wattage: two very different fixtures can deliver the same seedling outcome if their combined intensity and duration land in the right zone.

Fixture design changes how literally you should treat a starting distance. A bare bar light with no reflector spreads photons differently than a paneled LED with a diffusion lens, and a hooded HID throws a tighter, hotter beam than an open fluorescent tube. Check your fixture's own documentation for a baseline, then treat the ranges above as a safe zone to fine-tune from, not a number to set and forget.
Adjusting Distance as Seedlings Grow: Timing and Technique
Seedlings change fast during their first two weeks, and a height that was correct on day one can scorch the same plant by day seven. Building a simple routine keeps the fixture in step with the plant instead of several steps behind it.
- Check seedlings visually every day for the first two weeks, looking specifically at leaf color, stem posture, and any curling at the edges.
- Raise the light roughly once a week during this stage, or sooner if you see stretching or color change, since growth is rapid enough that a fixed height rarely stays correct for long.
- Measure the gap between the top of the canopy and the fixture each time you adjust, rather than eyeballing it, since even 5cm of difference changes intensity more than it looks like it should.
Dimming and moving solve different problems. Dimming lowers overall intensity without changing the light's footprint or spread, which is useful when a fixture covers the right area but is simply too strong for a young seedling. Moving the fixture farther away reduces intensity too, but it also widens or narrows the coverage pattern, which matters more when you are running multiple trays under one light and need even coverage across all of them.
Ratchet hangers and adjustable rope ratchets make this far easier than stacking books or cinder blocks under a tray. A basic pair of ratchet hangers lets you raise or lower a fixture in small, even increments on both sides at once, which keeps the light level instead of tilted toward one end of the tray. For growers running several trays at different growth stages under one light, staggering tray height with risers or small platforms can bring shorter seedlings closer to the canopy without having to split them onto a separate fixture.
Pro Tip: Make height adjustments in small steps, no more than 5 to 10cm at a time, and recheck the seedlings the next day before moving again.
Signs Your Grow Light Is Too Close or Too Far
Seedlings tell you when the light is wrong well before a meter would, if you know what to look for. The UNH fact sheet describes the physical symptoms of both extremes clearly, and catching them early avoids losing a tray altogether.
Light sitting too close typically shows up as:
- Bleaching or white patches on the uppermost leaves, where chlorophyll has broken down under excess intensity.
- Leaf "tacoing," where the edges curl upward as the plant tries to reduce its exposed surface area.
- Crispy, browning leaf margins that start at the tips and spread inward.
- Dry, overheated soil that needs watering far more often than the rest of the tray.
Light sitting too far away tends to produce the opposite pattern:
- Leggy, stretched stems reaching upward in search of more intensity.
- Pale or yellowish cotyledons that never develop the deep green of a well-lit seedling.
- Slow emergence of true leaves, with the plant staying in the cotyledon stage longer than expected.
The fix for either problem is usually small and immediate. If leaves show heat stress, move the fixture up 5 to 10cm and recheck the next day rather than making one large jump. If seedlings look stretched and pale, lower the light gradually, watching closely for the first sign of bleaching as you go, since the correction for legginess overshoots just as easily as the original problem. A seedling that has stretched significantly can sometimes be helped by burying more of the stem at transplant time, since cannabis and many other seedlings will root along a buried stem section. For a closer look at diagnosing and fixing active light burn, our photo guide to light burned seedlings walks through the visual stages in more detail, and our piece on the causes of slow seedling growth covers the legginess side of the equation.
How to Measure Light: PAR, PPFD, DLI, and Using a Light Meter
Guessing by eye works, but a light meter removes most of the uncertainty. PAR is the band of light plants actually use for photosynthesis, roughly 400 to 700 nanometers. PPFD measures how many of those usable photons land on a given area each second, expressed in µmol/m²/s. DLI adds the time dimension, totaling photon delivery across a full day rather than a single snapshot.
The UNH Cooperative Extension recommends placing a PAR/PPFD meter's sensor directly at canopy height, where the seedling's leaves actually sit, rather than at the pot rim or the top of the fixture. Taking several readings across the width of a tray and averaging them gives a more honest picture than a single reading at the center, since light intensity typically falls off toward the edges of a fixture's coverage area.
The PPFD target itself stays the same across fixture types, at 100 to 300 µmol/m²/s for seedlings, per the UNH fact sheet; what changes is the physical distance each fixture needs to land in that range, since LEDs, fluorescents, and HIDs all produce and focus light differently. For a broader rundown of how different fixture categories perform beyond the seedling stage, our guide to choosing the best grow light for indoor cannabis covers the tradeoffs in more depth.
Without a meter, plant cues become your measurement tool. A seedling with vivid green cotyledons, a compact stem, and leaves lying flat rather than curling is almost certainly in the right range. Growers who cannot measure PPFD directly can still manage DLI indirectly by extending photoperiod slightly and watching closely for the first signs of stretch, which signals the fixture needs to come down rather than stay on longer.

Quick Practical Checklist: Setup Through the First 14 Days
A short routine during the first two weeks prevents most of the problems growers run into later.
- Set initial hang height based on fixture type: about 30cm for LEDs, 10 to 15cm for fluorescents, roughly 90cm for HIDs.
- Set photoperiod to 14 to 18 hours and keep it consistent day to day.
- Check daily for stretch or bleaching during days 0 through 7, when seedlings are most vulnerable to both extremes.
- Raise the light in small steps as soon as you see leaf curling, bleaching, or dry soil near the fixture.
- Lower the light gradually if stems look stretched or cotyledons stay pale past day five or six.
- Pot up once true leaves appear and the root system has filled the starter cell, typically somewhere in the days 7 through 14 window.
Minimal equipment for this stage includes the fixture itself, a ratchet hanger or adjustable chain, a dimmer where the fixture supports one, and a simple thermometer to confirm the canopy isn't overheating. A PAR meter is a useful add-on but not a requirement for the first two weeks if you are watching the plants closely. If growth stalls despite correct distance, our article on slow seedling growth covers causes beyond lighting that are worth ruling out.
Lessons From Home Grow Setups on Light Distance
The most common mistake we see in home setups is treating the starting distance as permanent instead of as a day-one estimate. A new LED panel bought at face value, hung at the box's suggested height, often sits too close for a seedling still running on its cotyledons. The fix is rarely complicated: raise the light at the first sign of curling, then bring it down gradually as the plant builds tolerance over the following week.
Growers who skip the daily check are the ones who come back to a tray of bleached, crisped seedlings after a long weekend. A thirty-second glance each morning catches the problem while the fix is still a simple height adjustment rather than a lost tray. For symptoms beyond what's covered here, our guides on light burn and slow seedling growth go deeper into specific cases. If there's one habit worth building early, it's checking before adjusting, not after.
— Dino Grow Master
Starting Strong: Why Seed Quality Still Matters
Correct light distance gets a seedling off to a healthy start, but the genetics in that seed set the ceiling for how that seedling performs from there. Weak or inconsistent genetics can show symptoms that look like lighting problems, stretching, pale color, uneven growth, even when the fixture is set up correctly, which makes early troubleshooting harder than it needs to be.

We curate Our Quebec Line and resell established genetics across feminized and autoflower lines, each backed by a germination guarantee and support from a team that understands home growing conditions. Starting with seeds bred for reliable germination means less guessing about whether a weak start came from the light or the seed itself.
- A germination guarantee covers the one variable light distance can't fix: the seed's own viability.
- The support team can walk through early-stage symptoms alongside the lighting adjustments covered above.
- Shipping is handled with attention to timing and discretion.
Browse the current autoflower lineup and get seedlings off to a start that matches the lighting work you're already putting in.
FAQ
How far should lights be from seedlings?
Starting distances vary by fixture: about 30cm (12 inches) for LEDs, 10 to 15cm (4 to 6 inches) for fluorescent tubes, and roughly 90cm (36 inches) for HID fixtures, according to University of Saskatchewan growth cycle guidance. The goal is a PPFD of 100 to 300 µmol/m²/s at canopy height, so adjust from these starting points based on what you observe.
How many hours of light does a seedling need?
Most seedlings do well with 14 to 18 hours of light per day, with fluorescent fixtures often run on the longer end since they generate less heat, per University of Saskatchewan guidance. Consistency in the daily schedule matters as much as the total hour count.
How to tell if your grow light is too close?
Light sitting too close typically causes bleaching or white patches on upper leaves, leaves curling upward in a "tacoing" shape, and crispy, browning leaf margins, as described in the UNH seedling lighting fact sheet. Dry soil near the fixture that needs frequent watering is another common sign of excess heat.
How far should a 600 watt grow light be from seedlings?
There is no single universal distance tied to wattage alone, since fixture design and lens type change how intensity spreads at any given height. Use the fixture-type starting ranges as a baseline, measure PPFD at canopy height where possible, and raise the light at the first sign of bleaching or leaf curl regardless of the wattage printed on the fixture.
Should I dim my grow light or just move it farther away?
Dimming reduces intensity without changing the light's coverage footprint, which works well when the area covered is already correct but the plant needs less intensity. Moving the fixture changes both intensity and spread, which matters more when you're adjusting coverage across multiple trays at once.
Sources
- Seedlings - Gardening at USask - College of Agriculture and Bioresources | University of Saskatchewan
- Growing seedlings under lights Fact Sheet | UNH Cooperative Extension